A full sleeve takes 25–40 hours of work split across 4–6 sessions, and you’ll need to decide early whether you want bold imagery that reads from a distance or fine detail that holds up under scrutiny.
Bold black styles like geometric and tribal heal faster and hold their edges longer, while portraits and nature scenes need multiple sessions to build smooth gradients and soft transitions.
1. Japanese Traditional Waves and Dragons
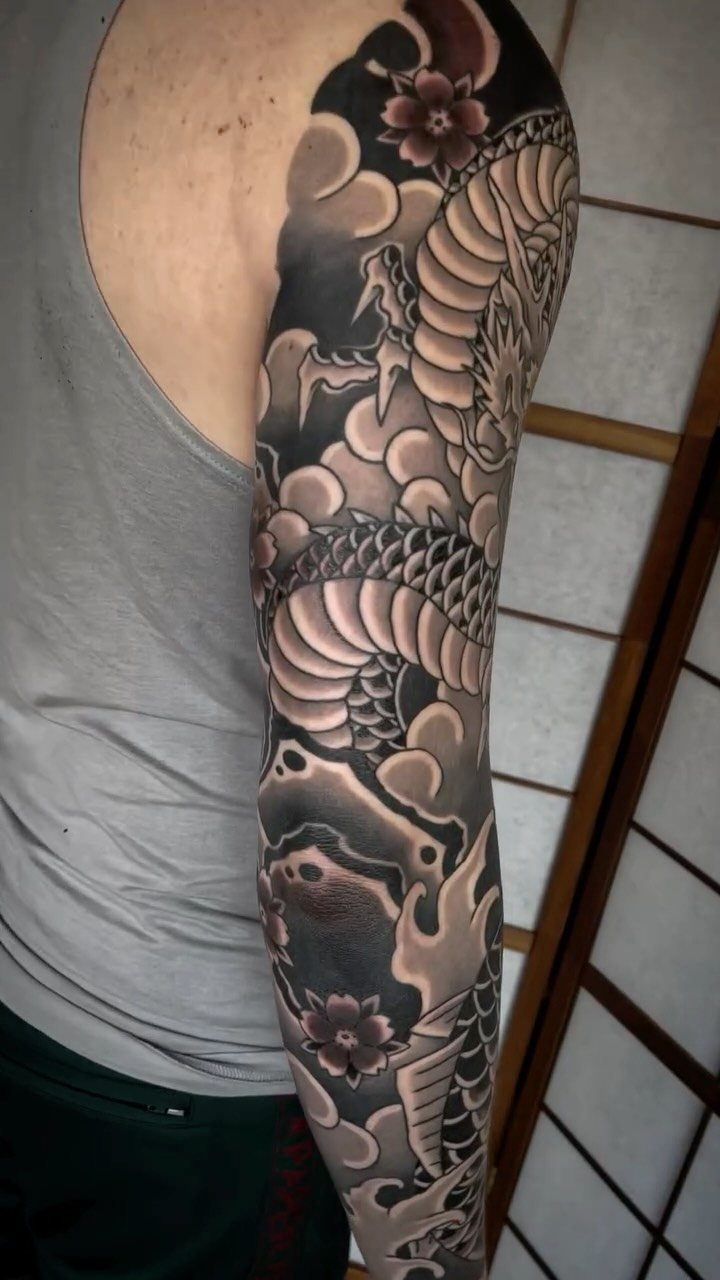
Japanese traditional sleeves build around a central figure, usually a dragon, koi or phoenix, then fill the space with waves, clouds and blossoms that curve with the arm.
The composition wraps the whole limb so every angle shows part of the story.
Black and grey softens the look compared to the original bright palette, and you can add color later if you change your mind.
A full sleeve splits across several sessions and the final cost depends on your artist’s hourly rate and how dense the design runs.
The style reads clearly from a distance and ages well because the bold outlines hold their shape as the ink spreads over time.
2. Realism Portraits
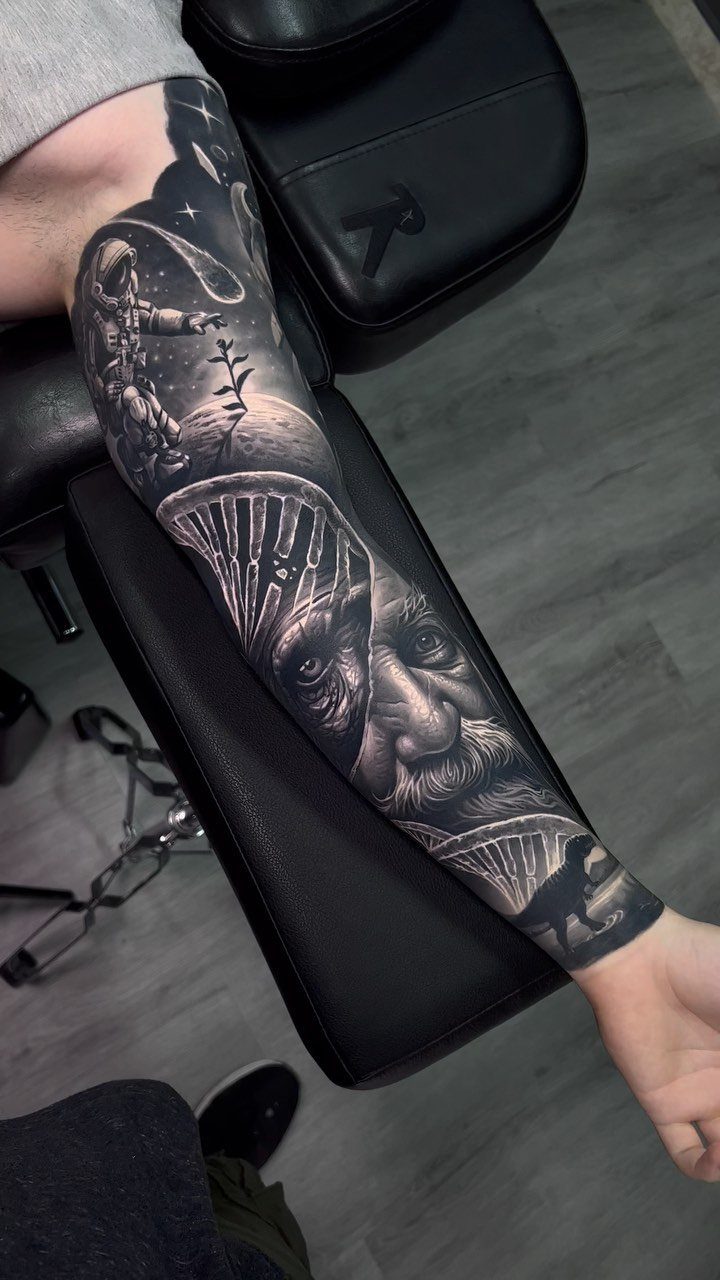
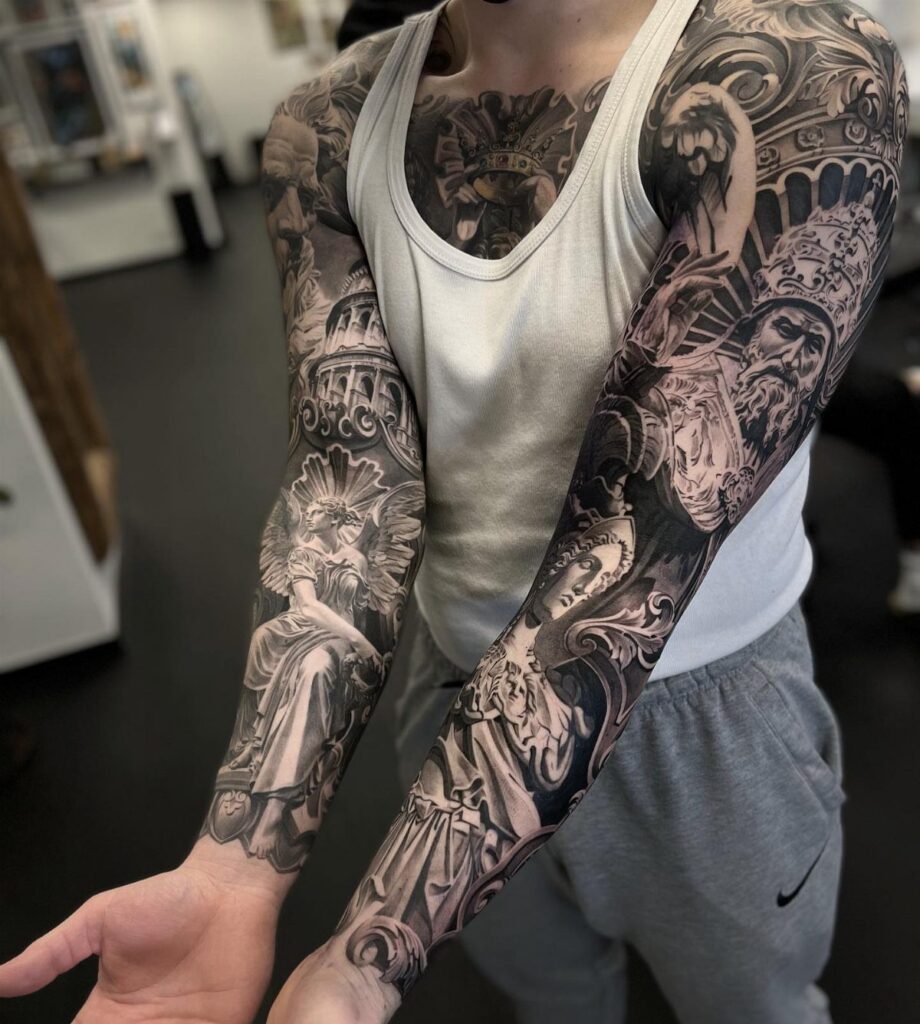
Portrait sleeves turn the arm into a gallery of faces, usually family members, historical figures or icons you respect. Black and grey realism gives you the full tonal range to capture detail in skin, fabric and expression.
Faces demand precision, so find an artist whose portfolio shows clean portraiture with accurate proportions and smooth shading.
A single large portrait on the forearm takes a full day sitting; filling the whole sleeve with multiple portraits scales with how much background you include.
Portraits look best on arms with enough surface area to give each face room to breathe, so skinnier builds may want fewer, larger images rather than crowding several small ones.
3. Geometric & Blackwork
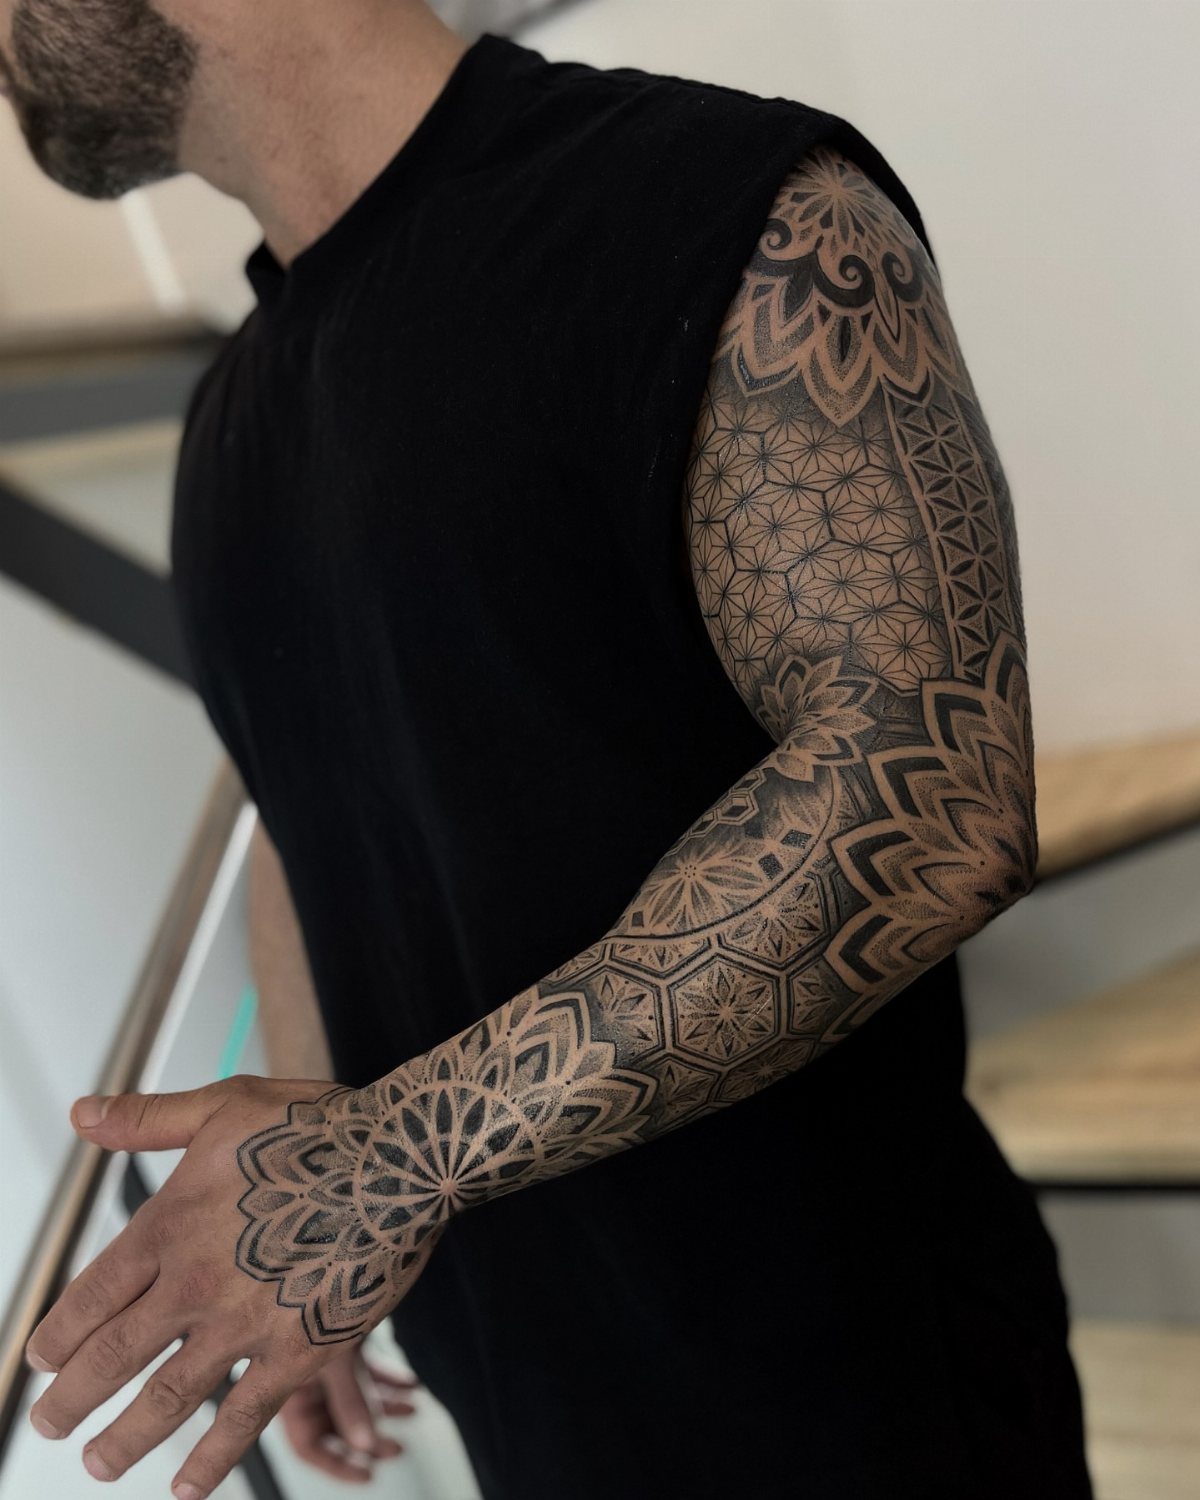
Geometric sleeves use repeating patterns, mandalas and angular shapes that follow the arm’s contours.
Solid black sections contrast with negative space to create depth, and the symmetry works especially well on lean builds where the lines stay crisp over defined muscle.
The style scales easily, so you can start with a half sleeve and extend it later without disrupting the design.
Sessions run shorter than realism since there’s less shading, but precision matters more; a wobbly line shows immediately in geometric work.
Blackwork tends to hurt more than grey shading because the needle stays in one spot longer to pack the ink solid, but you get bold contrast that stays readable for decades.
4. Biomechanical
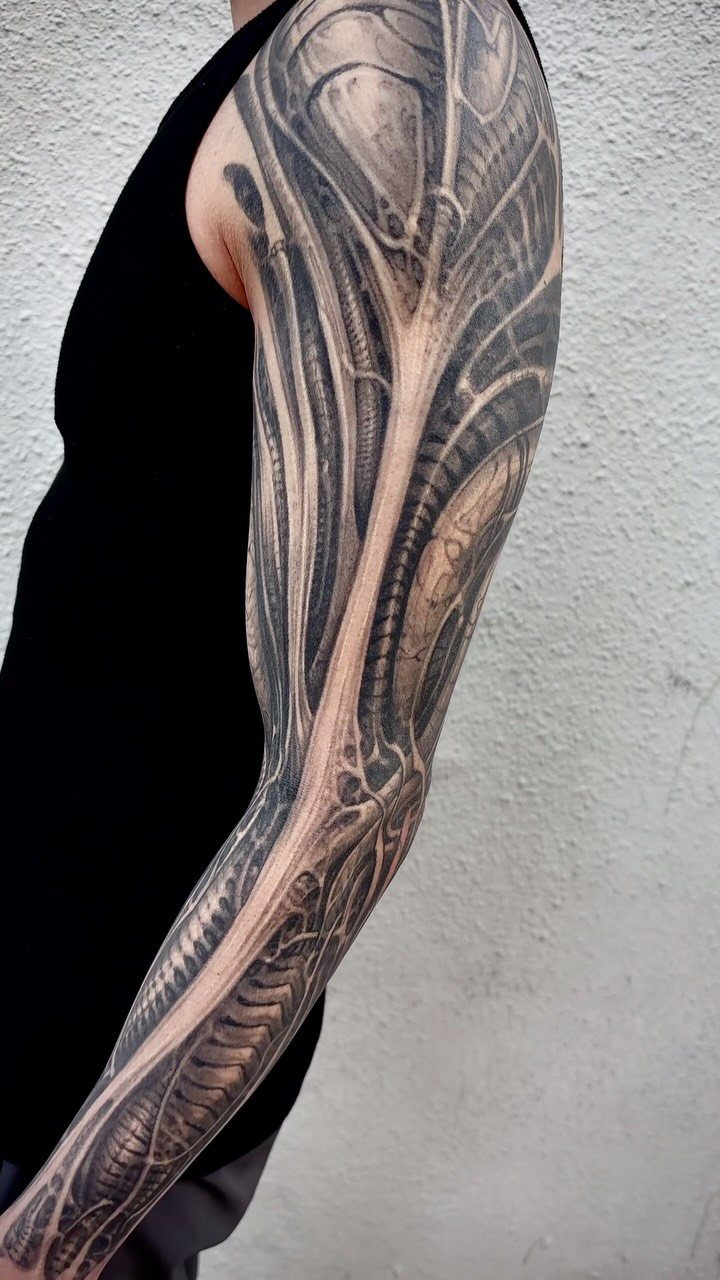
Biomechanical sleeves treat the arm like it’s been opened to reveal gears, pistons and cables under the skin. The artist layers mechanical parts into the muscle and bone structure, placing shadows and highlights to make the metal look three-dimensional.
This style shows off arm definition, so it suits builds with visible muscle separation. The shading is complex and the artist needs to understand anatomy to make the mechanical parts look like they belong inside your body.
This one took about 27 hours to finish. Plan on several long sessions since stopping mid-section can leave visible seams in the shading, and bring padding for the chair because sitting still that long gets uncomfortable fast.
5. Christian Crosses
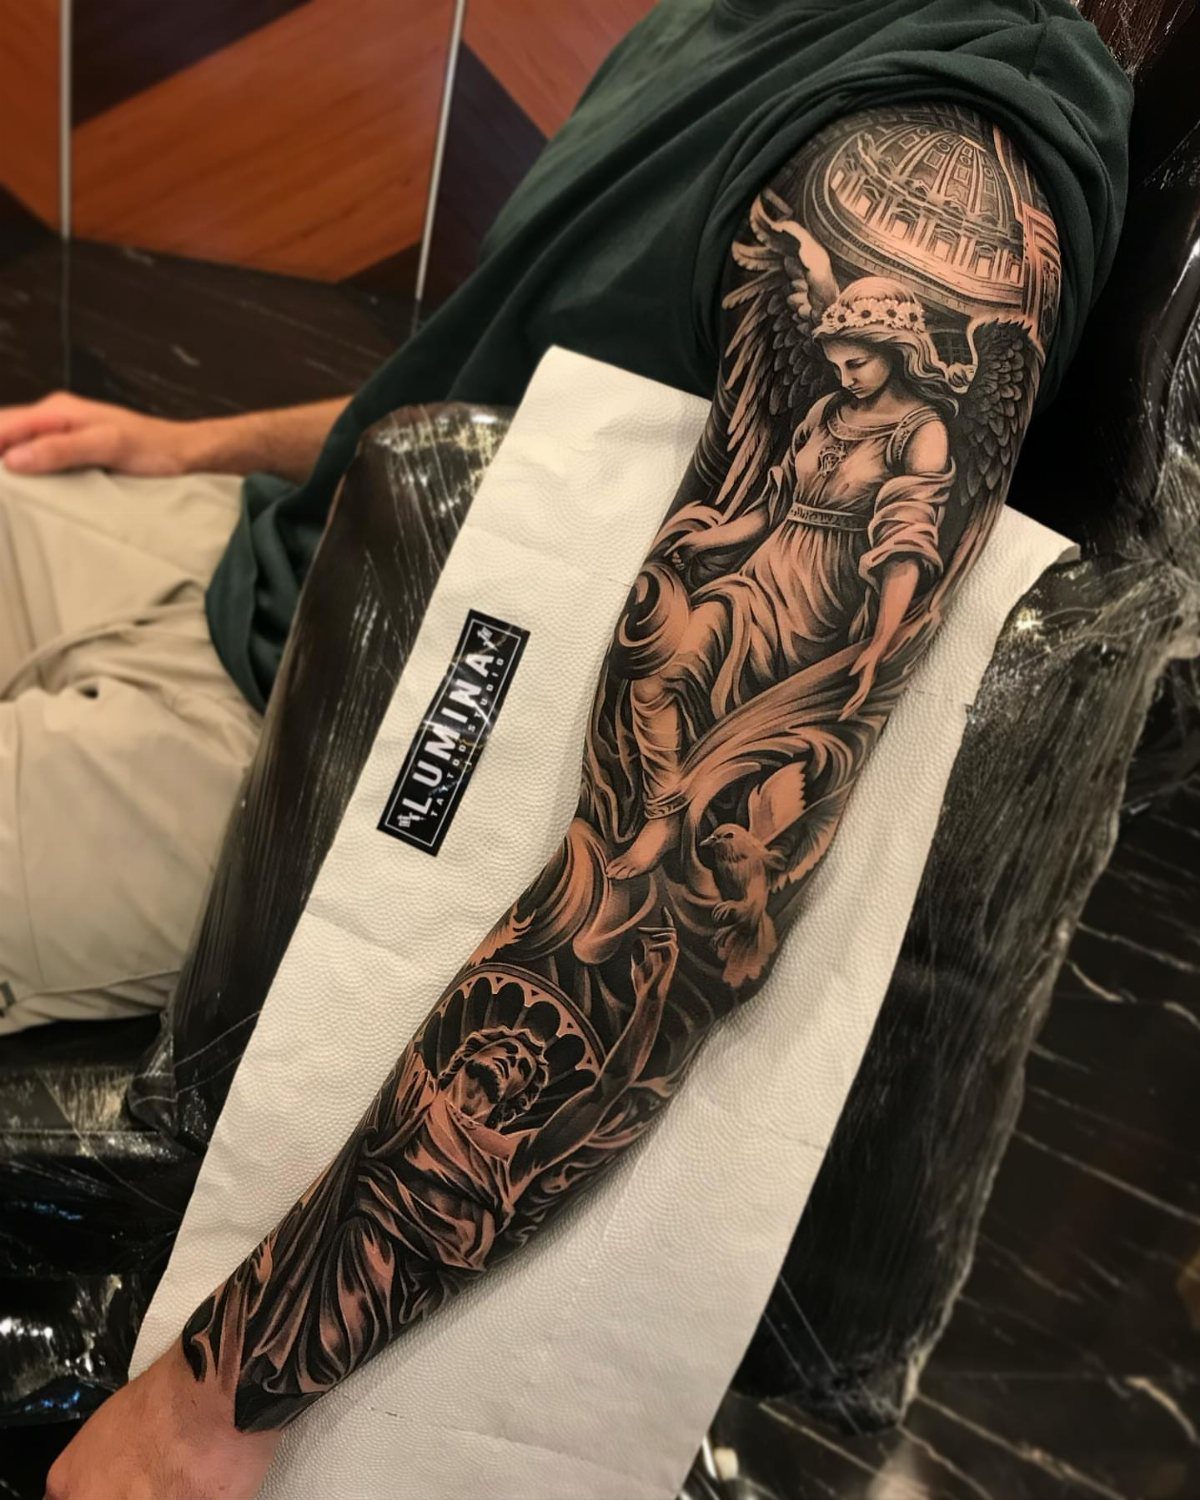
Christian sleeves center on crosses, praying hands, scripture verses or angels, often combined with architectural details like cathedral windows or Roman columns. The iconography layers to tell a story, with larger figures anchoring the composition and smaller symbols filling gaps.
Black and grey keeps the tone reverent, though some add subtle color in halos or stained glass elements. A full sleeve scales with detail level and typically runs across multiple sessions.
Script needs careful placement since words on curved surfaces distort depending on the viewing angle. Position any text on the flatter parts of the forearm where it reads clearly when your arm hangs naturally.
6. Tribal Patterns
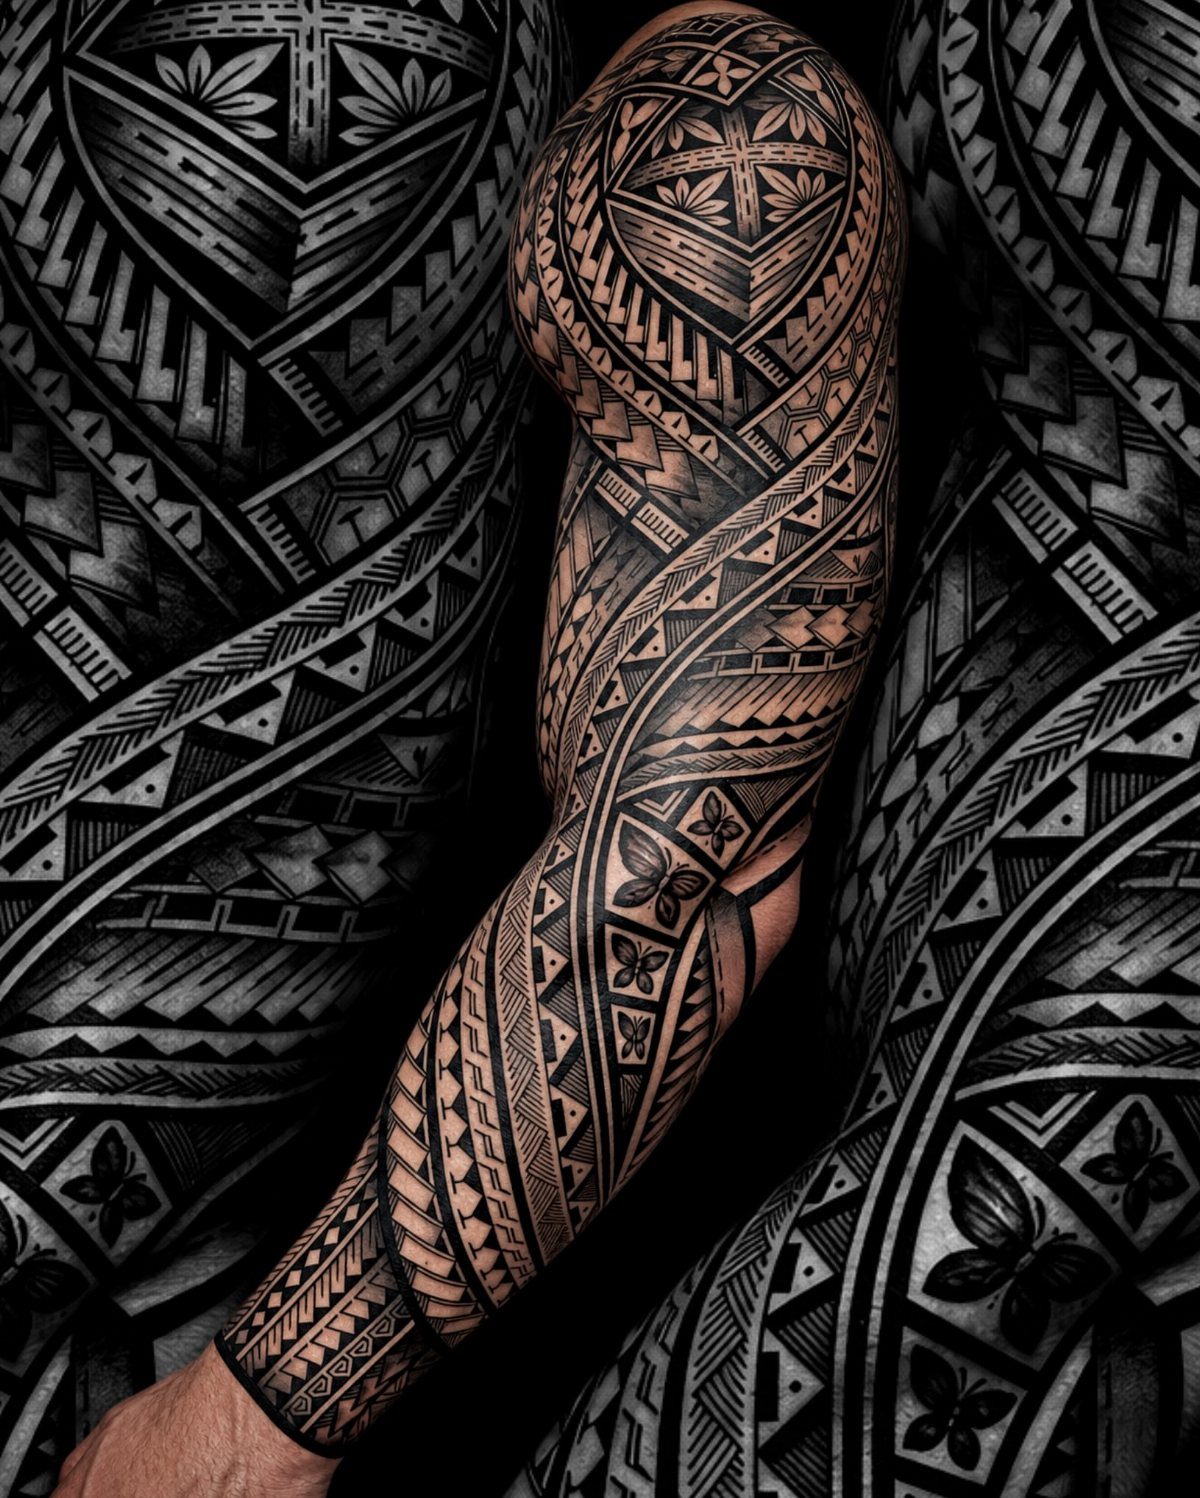
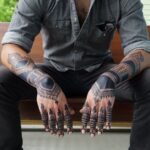
Tribal sleeves rely on thick black lines that form interlocking patterns, often inspired by Polynesian, Maori or Pacific Islander designs. The solid shapes wrap the arm in bold sections that read clearly from across a room.
Traditional tribal follows specific cultural meanings, so if you’re drawing from a particular tradition, research the symbols and consider working with an artist who specializes in that style.
Modified tribal borrows the aesthetic without the cultural specifics, giving you more freedom to customize the pattern.
Solid black packs densely and heals cleanly, holding crisp edges for years without the color fade you see in lighter work. The style ages exceptionally well because there’s no fine detail to blur out over time.
7. Nature Scenes with Trees Animals Landscapes
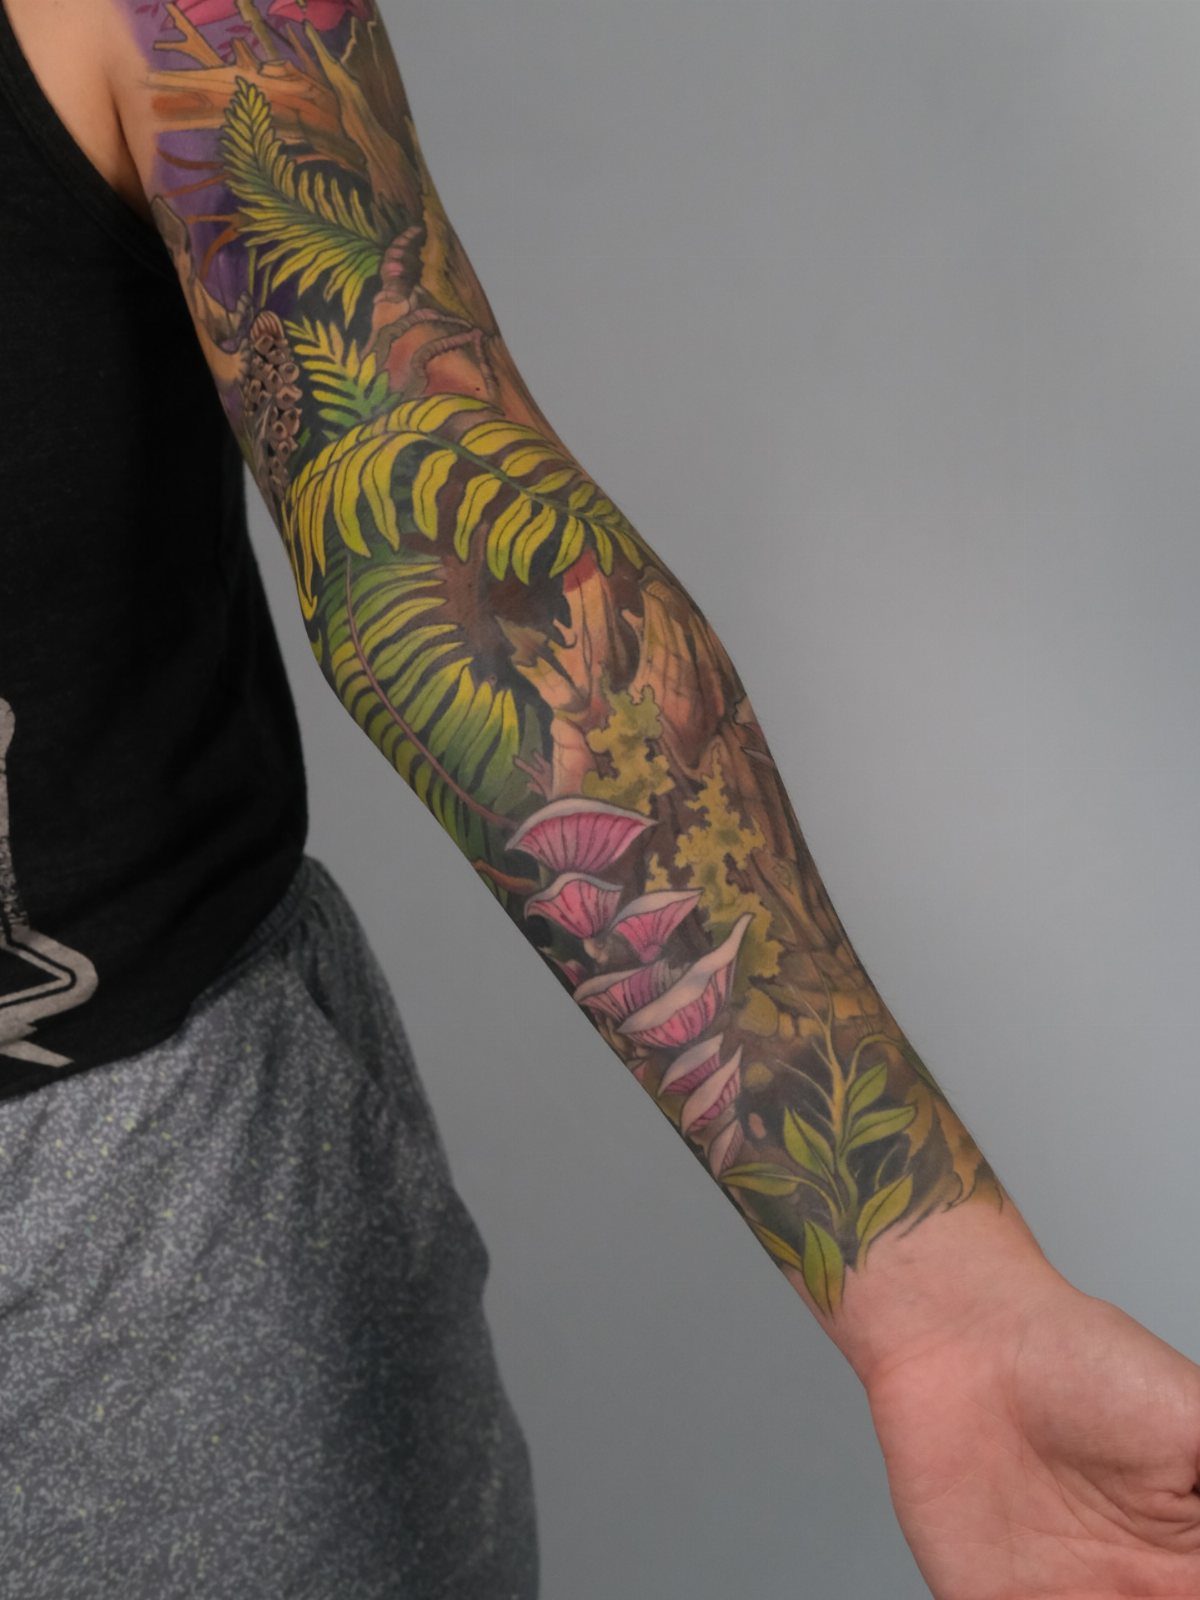
Nature sleeves wrap the arm in forest scenes, placing trees from root to canopy, animals in mid-motion, or mountain ridges that disappear into mist.
Organic shapes flow naturally around the arm’s curves, and you can build the composition over time by adding layers of detail to the background.
Color brings the scene to life, though black and grey keeps it subtler if you work in an office that frowns on bright ink.
Fauna needs an artist who can handle fur texture and realistic proportions, so check portfolios before committing.
Full coverage takes multiple sessions since natural shading builds gradually, and dense foliage heals slower than open designs.
8. Gothic Architecture and Statues
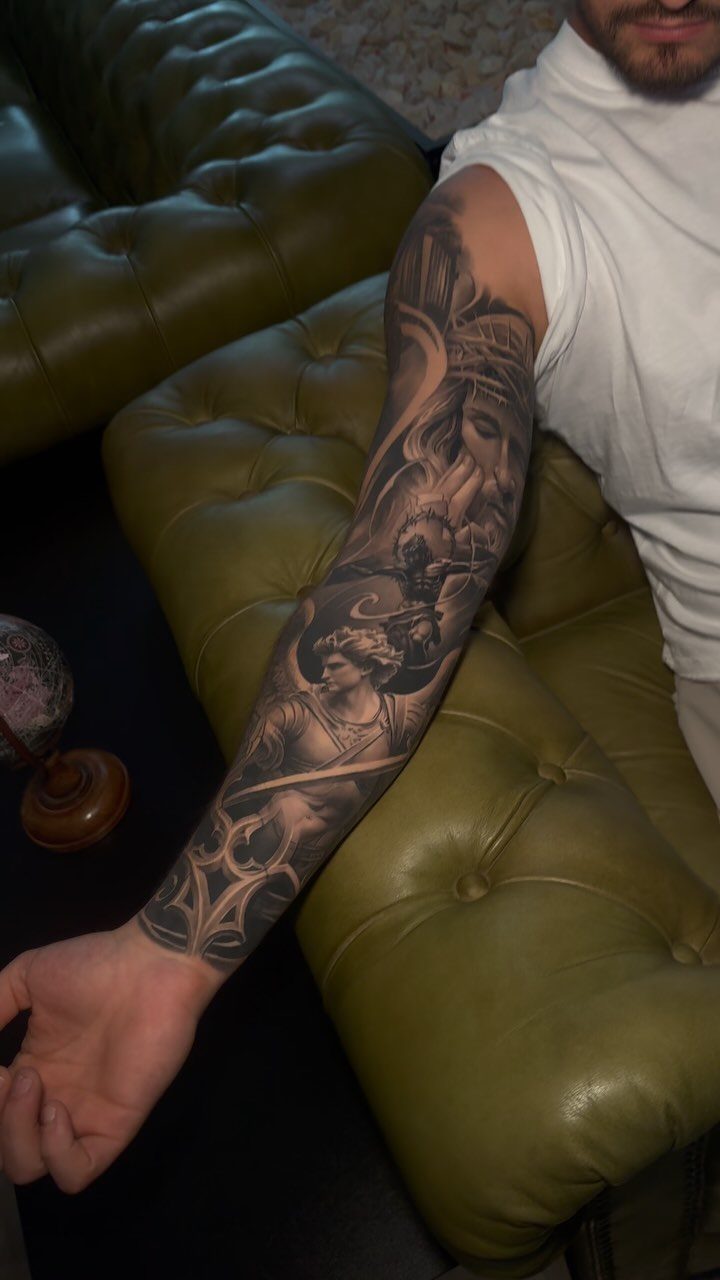
Gothic sleeves stack statues, cathedral arches and winged figures in black and grey to mimic carved stone. The shading technique mimics the weight and texture of marble, using contrast to make flat surfaces look three-dimensional.
This style suits arms with length to carry tall vertical elements like columns or standing figures without compressing the proportions. Angels, saints or classical sculptures anchor the composition, with architectural details filling the spaces between.
Expect a long commitment since realistic stone texture takes hours of tight shading, and the design reads best when completed in one continuous piece rather than added piecemeal.
9. Dark Floral Sleeve
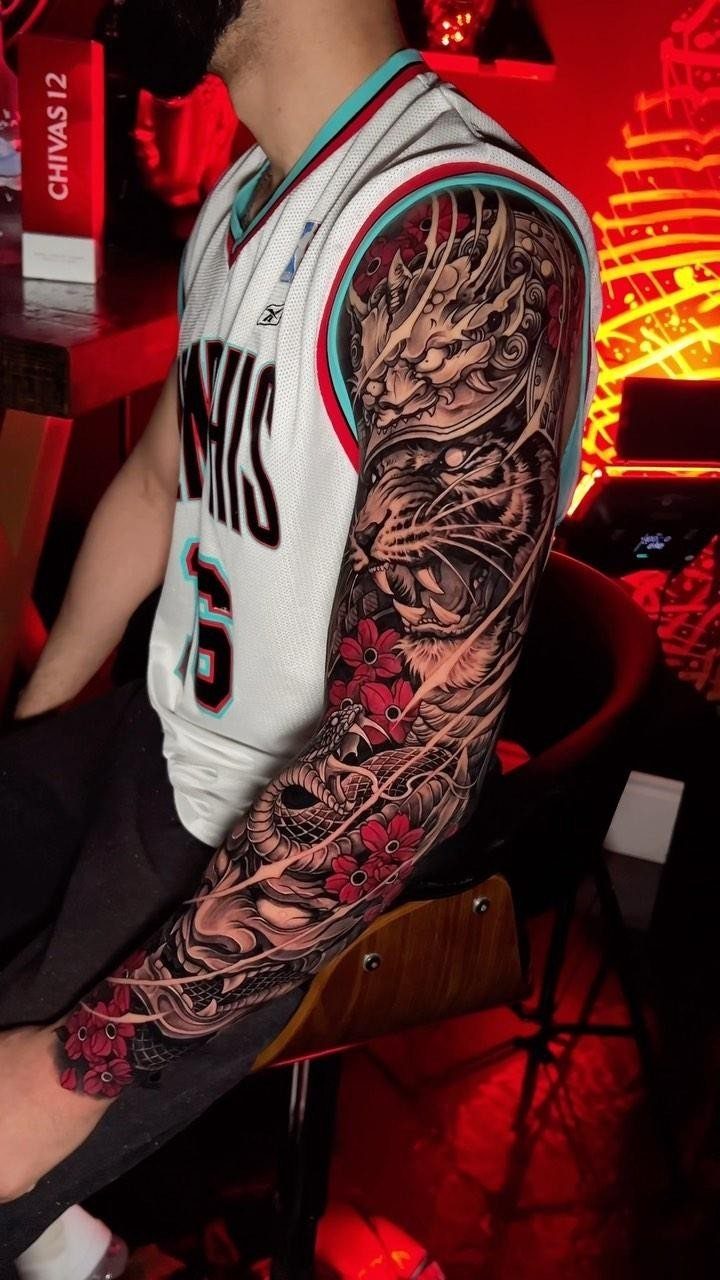
Dark floral sleeves pair heavy black ornamental patterns with bursts of red, crimson or deep burgundy in rose or peony petals.
The contrast keeps the flowers from disappearing into the dark background, and red ink holds its intensity longer than softer pinks or pastels.
The ornamental work can lean baroque, gothic or geometric depending on your preference, but the structure stays bold enough to frame the flowers rather than compete with them.
A full sleeve balances the color placement so the red draws the eye without clustering in one spot.
Red ink can be harder on sensitive skin than black, so mention any reactions you’ve had before starting.
Pain Management
Pain varies by area.
The outer bicep, forearm and shoulder cap stay manageable, rating around 3–4 out of 10. The inner forearm and wrist bone climb to 5–6 out of 10 as the needle crosses thinner skin and more nerve endings.
The inner bicep close to the armpit and the skin over both sides of the elbow rank among the sharpest spots on the arm.
The elbow ditch has almost no padding, and the constant bending during daily movement makes that spot especially sensitive.
Break longer sessions into segments so you’re not grinding through high-pain zones for hours straight.
Eat a full meal beforehand and bring water; low blood sugar makes pain harder to tolerate. Avoid alcohol or ibuprofen before the appointment since both thin your blood and increase bleeding, which pushes ink out and extends the session.
Healing Protocol
The top layer closes within 2 to 3 weeks after each sitting, while the ink below needs longer to lock in. The first 3 days bring inflammation and some weeping; keep the area clean and follow your artist’s aftercare instructions exactly.
Between day 4 and day 14 you’ll see peeling and feel the urge to scratch. Let the skin shed on its own and apply fragrance-free lotion when it feels tight.
At the 3-week mark the skin reads as closed, but repair continues underneath for another week or more. Stay out of pools, lakes and ocean water until the full month passes, and keep direct sun off the fresh ink.
Once the tattoo has sealed, put sunscreen rated SPF 50 or higher on it every day to keep the color from washing out.
Cost and Time Commitment
High-demand artists charge more, and realistic styles with dense shading or portraiture take longer than bold graphic work.
Plan for 25–40 hours of chair time spread across multiple sessions. Few people sit for a full sleeve in one go; most break it into 4–6 appointments spaced weeks apart to allow each section to heal before continuing.
Book a consultation before committing to discuss the design, get a clearer cost estimate and confirm the artist’s availability.
Most artists ask for a deposit up front to hold your appointment, and that amount comes off the total when you pay.
Frequently Asked Questions
How much does a full sleeve tattoo cost?
Plan to spend $3,750 to $12,000 or more.
Most artists charge $150 to $300 per hour, and a sleeve typically takes 25 to 40 hours, so expect a final bill between $3,750 and $12,000. Realism and portrait work take longer than bold graphic designs, so the style affects the total cost.
How long does it take to heal a full sleeve tattoo?
Each session heals in 2 to 3 weeks at the surface, but the ink underneath needs closer to a month to settle fully.
Since a full sleeve breaks into multiple sessions spaced weeks apart, the whole process from first appointment to final healed skin typically takes 6 months.
Do full sleeve tattoos hurt?
Yes, but the level shifts across the arm. The outer bicep, forearm and shoulder cap stay tolerable at around 3 to 4 out of 10, while the inner bicep near the armpit and both sides of the elbow spike to 8 or 9 out of 10.
Breaking the work into multiple sessions makes it easier to get through the high-pain zones.